Ghost cookies
Ghost cookies are the perfect spooky treat for Halloween! These delightful bites not only look adorable but are also incredibly easy to make. With just a few ingredients, you can transform ordinary cookies into charming ghostly figures that will thrill your guests. Whether you’re hosting a Halloween party, looking for a fun baking project with the kids, or simply wanting to add some festive flair to your dessert table, ghost cookies fit the bill perfectly!
Why You’ll Love This Recipe
- Quick and Easy: With just 25 minutes of prep time, you can whip up these treats in no time.
- Fun for Everyone: Kids and adults alike will enjoy decorating and eating these spooky snacks.
- Customizable Design: Change the expressions on your ghost cookies using different icing techniques.
- Perfect for Parties: These cookies are a hit at Halloween parties and gatherings.
- Minimal Ingredients: You only need four simple ingredients to create these delightful desserts.
Tools and Preparation
To make your ghost cookies, you’ll need some essential tools to ensure everything goes smoothly. Having the right equipment makes baking faster and more enjoyable.
Essential Tools and Equipment
- Baking sheet
- Parchment paper
- Mixing bowl
- Spatula
- Measuring cups
Importance of Each Tool
- Baking sheet: Provides a stable surface to bake your cookies evenly.
- Parchment paper: Ensures that cookies don’t stick, making cleanup easy.
- Mixing bowl: Ideal for mixing icing sugar and other ingredients without mess.
Ingredients
For the Ghost Cookies
- 175g icing sugar
- 1 x 200g pack chocolate chunk cookies
- 9 marshmallows (regular size)
- black writing icing
How to Make Ghost cookies
Step 1: Prepare Your Workspace
Start by gathering all your ingredients and tools. Preheat your oven if needed, although this recipe doesn’t require baking.
Step 2: Make the Icing
In a mixing bowl, combine the icing sugar with a small amount of water until it reaches a thick yet spreadable consistency.
Step 3: Decorate the Cookies
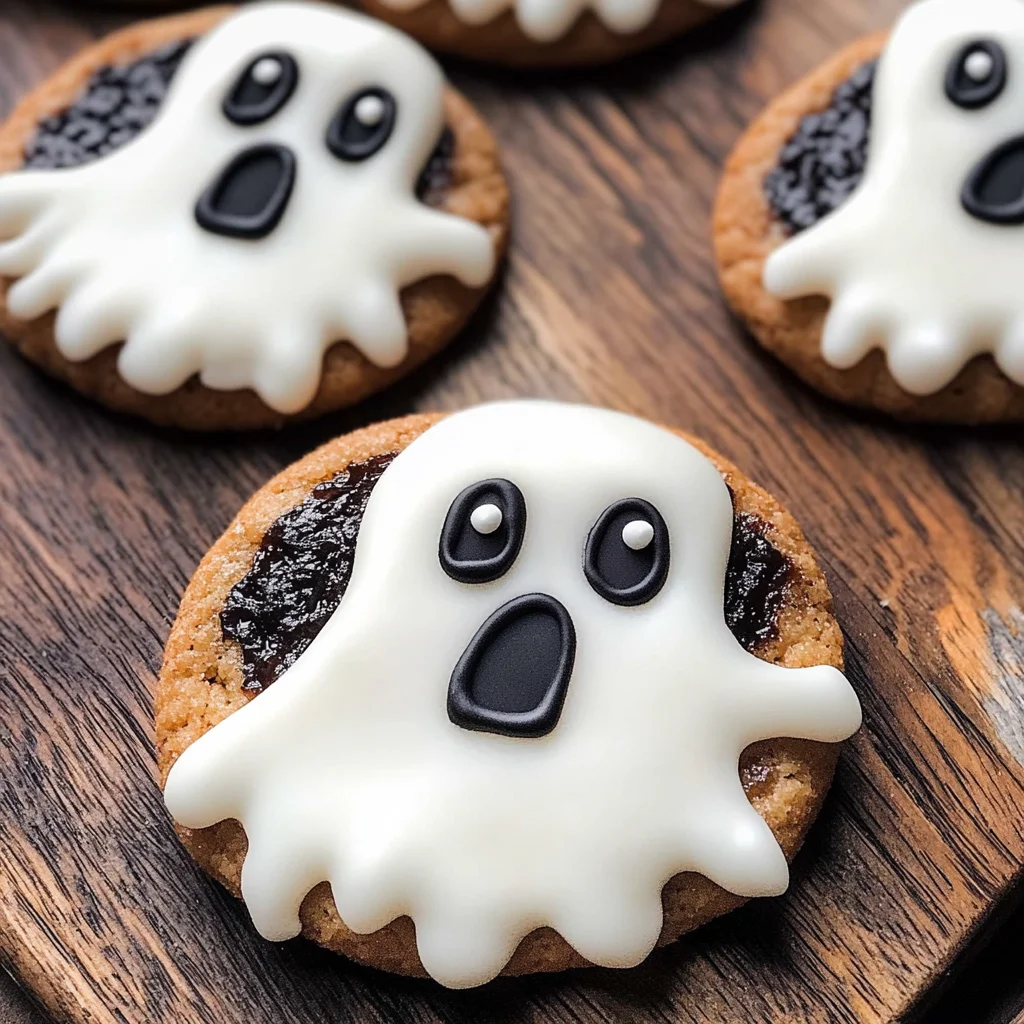
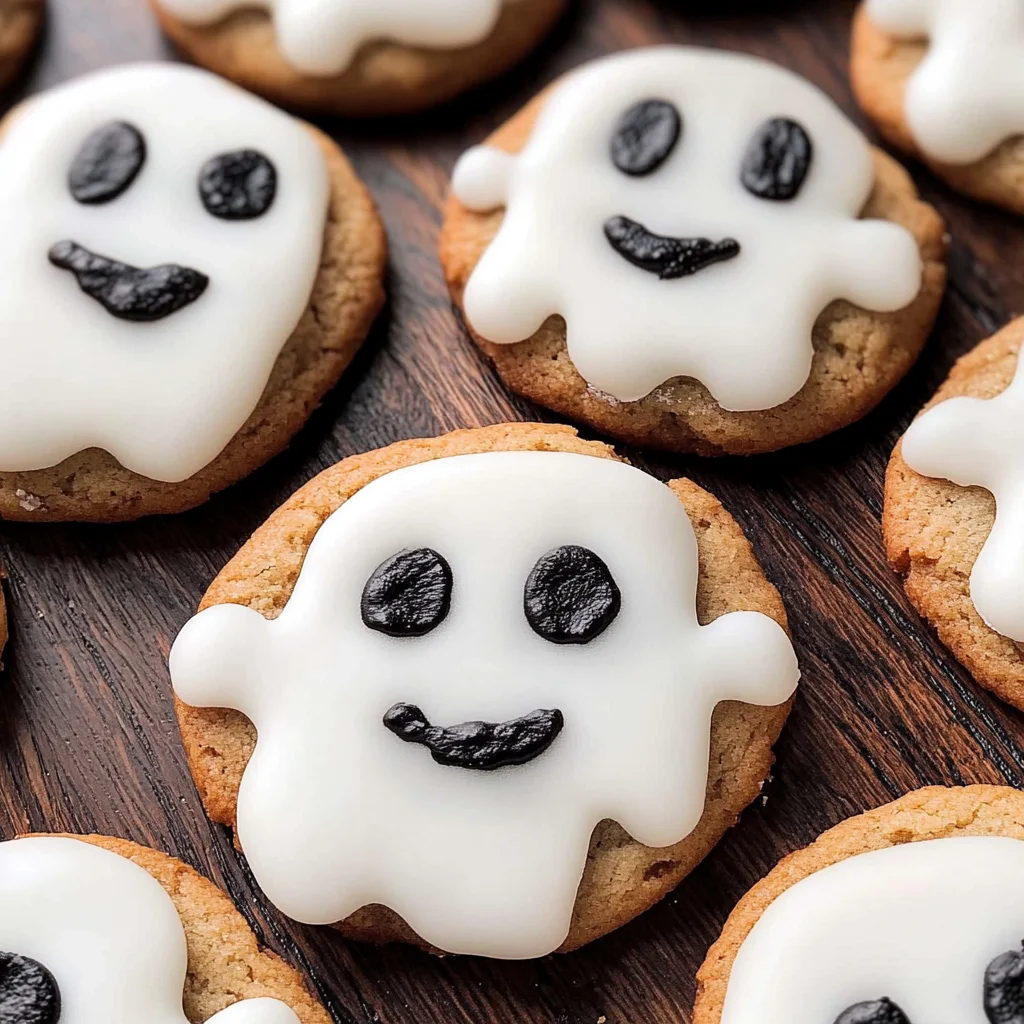
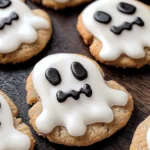
Take each chocolate chunk cookie, and spread a layer of the icing over the top. Place one marshmallow in the center of each iced cookie as the ghost’s head.
Step 4: Add Facial Features
Using the black writing icing, draw eyes and mouths on each marshmallow to create spooky expressions. Get creative with different faces!
Step 5: Allow to Set
Let your decorated ghost cookies sit for about 10 minutes so that the icing can set before serving them.
Enjoy these fun ghost cookies at your next Halloween event or as a sweet treat throughout October!
How to Serve Ghost cookies
Ghost cookies make a delightful addition to any Halloween celebration. These spooky treats are not only fun to eat but also visually appealing. Here are some creative serving suggestions for your ghostly delights.
Individual Ghost Treats
- Serve each ghost cookie on its own with a small decorative plate. This makes for a charming treat at Halloween parties.
Ghostly Dessert Platter
- Arrange ghost cookies on a large platter alongside other Halloween-themed snacks. Add some candy corn and chocolate spiders for an extra festive touch.
Party Favors
- Wrap individual ghost cookies in clear cellophane bags tied with orange or black ribbon. They make fantastic party favors for guests to take home.
Hot Cocoa Pairing
- Serve ghost cookies with warm cups of hot cocoa. The sweetness of the cookies complements the rich chocolate flavor of the drink perfectly.
Halloween Movie Night Snack
- Set out a bowl of ghost cookies during your Halloween movie marathon. They’ll be a hit while enjoying classic horror films!
How to Perfect Ghost cookies
To achieve the perfect ghost cookies, keep these simple tips in mind. They will help you enhance both the taste and presentation of your spooky treats.
- Use fresh ingredients: Always use fresh marshmallows and high-quality chocolate chunk cookies for the best flavor.
- Maintain icing consistency: Ensure your icing sugar mixture is smooth to create a clean coating for your ghost cookies.
- Customize designs: Get creative with your black writing icing! Draw different faces on each ghost cookie for added personality.
- Cool before decorating: Allow your chocolate chunk cookies to cool completely before adding icing and marshmallows; this prevents melting and messiness.
Best Side Dishes for Ghost cookies
Ghost cookies pair wonderfully with a variety of side dishes that enhance their spooky charm. Consider these tasty options when planning your Halloween spread.
- Pumpkin Soup: A warm, creamy pumpkin soup that adds seasonal flavor and comfort to your dessert table.
- Witch’s Brew Punch: A fun, green punch made from lime soda and sherbet; perfect for quenching thirst at parties.
- Cheese Platter: An assortment of cheeses, crackers, and fruits provides a savory contrast to sweet ghost cookies.
- Candy Corn Salad: A colorful mix of candy corn, nuts, and popcorn offers a crunchy snack that’s easy to prepare.
- Savory Pigs in a Blanket: Mini sausages wrapped in pastry dough make for a delicious finger food option alongside sweets.
- Spooky Veggie Tray: Carrots, celery sticks, and bell peppers arranged like spooky creatures add healthy crunch to your dessert spread.
Common Mistakes to Avoid
Baking ghost cookies can be a fun and easy activity, but some common mistakes can ruin the experience.
- Ignoring Ingredient Temperature: Using cold ingredients can lead to uneven mixing. Make sure your butter and eggs are at room temperature for the best results.
- Not Measuring Accurately: Baking is a science. Use a kitchen scale or measuring cups carefully to avoid inconsistencies in your ghost cookies.
- Overbaking: Keep an eye on your cookies while they bake. Overbaking can make them hard instead of soft and chewy.
- Skipping Decoration: The fun of ghost cookies is in their spooky appearance! Don’t skip the icing and decorations; they make the treat festive.
- Using Expired Ingredients: Check your baking supplies for expiration dates. Using stale ingredients can affect flavor and texture.
Storage & Reheating Instructions
Refrigerator Storage
- Store ghost cookies in an airtight container.
- They will stay fresh for up to 5 days in the refrigerator.
Freezing Ghost cookies
- Wrap each cookie individually in plastic wrap before placing them in a freezer bag.
- Ghost cookies can be frozen for up to 3 months.
Reheating Ghost cookies
- Oven: Preheat to 350°F (175°C) and warm for about 5-7 minutes.
- Microwave: Heat one cookie at a time for about 10-15 seconds for a soft treat.
- Stovetop: Place a cookie in a pan on low heat for 1-2 minutes, covered, to retain moisture.
Frequently Asked Questions
Here are some common questions about making ghost cookies.
What are ghost cookies?
Ghost cookies are festive treats made by decorating chocolate chunk cookies with icing and marshmallows to resemble spooky ghosts. They are perfect for Halloween celebrations!
How can I customize my ghost cookies?
You can customize ghost cookies by using different types of icing colors or adding sprinkles. Feel free to use flavored toppings like caramel or peanut butter!
Can I use gluten-free cookies for this recipe?
Yes, you can substitute regular chocolate chunk cookies with gluten-free varieties to accommodate dietary restrictions while still enjoying delicious ghost cookies.
How long do these ghost cookies last?
When stored properly, ghost cookies will last about 5 days in the refrigerator or up to 3 months in the freezer.
Final Thoughts
These ghost cookies are not only easy to make but also delightful additions to any Halloween gathering. Their charming appearance and customizable nature make them a versatile treat that everyone will love. Don’t hesitate to try different toppings and decorations; let your creativity shine!
Ghost Cookies
- Total Time: 25 minutes
- Yield: Approximately 9 servings 1x
Description
Ghost cookies are the ultimate spooky treat for Halloween, combining adorable designs with a simple preparation process that anyone can master. These delightful chocolate chunk cookies topped with marshmallows and icing are perfect for festive gatherings or a fun baking activity with the kids. In just 25 minutes, you can create these charming ghostly figures that will enchant your guests and add a whimsical touch to your dessert table. Whether you’re hosting a Halloween party or looking for unique holiday snacks, these ghost cookies are sure to impress!
Ingredients
- 175g icing sugar
- 1 x 200g pack chocolate chunk cookies
- 9 regular-sized marshmallows
- Black writing icing
Instructions
- Gather all ingredients and tools; no baking is needed.
- In a mixing bowl, combine icing sugar with a small amount of water until thick yet spreadable.
- Spread the icing on each chocolate chunk cookie and place one marshmallow in the center of each iced cookie.
- Use black writing icing to draw spooky faces on each marshmallow.
- Allow the cookies to set for about 10 minutes before serving.
- Prep Time: 25 minutes
- Cook Time: 0 minutes
- Category: Dessert
- Method: No baking required
- Cuisine: American
Nutrition
- Serving Size: 1 cookie (approximately 40g)
- Calories: 180
- Sugar: 12g
- Sodium: 80mg
- Fat: 8g
- Saturated Fat: 3g
- Unsaturated Fat: 5g
- Trans Fat: 0g
- Carbohydrates: 26g
- Fiber: 1g
- Protein: 2g
- Cholesterol: 10mg
Keywords: Feel free to customize your ghostly designs with different expressions using the black writing icing. For an extra festive touch, consider adding edible glitter or colorful sprinkles.